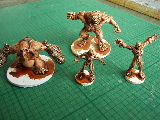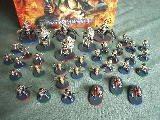
A Guide to speed painting! These particular figures are from the excellent DOOM boardgame but there is no reason why the same techniques can't work with any miniatures, enjoy! Click here to see the Descent figures!!! Click here to see Forbidden Forest figures!!! Click here to see Well of Darkness figures!!! Click here to see Altar of Despair figures!!! Click here to see Tomb of Ice figures!!! Click here for a quick guide to creating fancy figure bases!!! Speedpainting Xtreme, Skeleton Dragon in 1 1/2 hours!!! Bear in mind that a total of only 14 colours were used too! Back to other figures page for lots more funky stuff! Bronzed flesh, Bleached bone, gunbolt metal, mithril silver, snake bite leather (demons), sulphur yellow, Space Wolf Grey, Rotting flesh, white, black, red, flesh wash, black ink. That's 14 pots for the WHOLE lot! |
Step 1 base colours are first painted, I chose GW bronzed flesh for my figures, all the 'metal' parts are picked out in GW boltgun metal, don't worry about being too neat at this point as the wash tends to bring the colours together. The whole figures are then 'washed' with GW flesh wash ink. This is quite simply painted over the whole base colour and allowed to settle in the recesses, you will find it really helps to bring out the detail.
|
Step 2 Once dry the figures are then drybrushed, choose a large soft brush and dip it in your paint (the original base colour of bronzed flesh in this case). Wipe the excess from the brush using a piece of kitchen towel until the brush is nearly dry then simply 'dust' the whole figure, you will find this brings out the raised details of the figure as well as creating a basic illusion of light and shadow. Keep practicing and you will soon learn how much pressure to use and where to apply :O) |
Step 3 The next thing to do is to 'fine-line' the miniature. All this entails is using a small, fine brush to pick out the raised areas of the model in a lighter colour. This in effect brings out the detail and creates the illusion of light against the darker recessed areas. I recommend adding a little water to the fine-line colour to make it easier to work with, thick paint always works against you at this stage. Try to experiment, you will soon find that you develop an eye for just where thise lines have to go. The colour I chose to fine-line was GW bleached bone, always try and use a colour lighter than the base coat and if possible one which you do not have to mix, this saves a lot of time! |
Step 4 Really thats all there is to it, only thing thats left to do is pick out the details such as eyes and teeth and paint the bases, easy! Try to over exagarate the details such as the teeth for instance, go right up to white for the final highlight so they really stand out, on figures like these which are mostly one colour you really need a focal point and it gives them a great cartoony 'cell shaded' sort of look in my opinion |
Site Design By Skud © Bulldog Models 2006 -2007 |

tn.jpg)
tn.jpg)
tn.jpg)
tn.jpg)
tn.jpg)
tn.jpg)
tn.jpg)
tn.jpg)
tn.jpg)
tn.jpg)

TN.jpg)
TN.jpg)
TN.jpg)
TN.jpg)
TN.jpg)
TN.jpg)
TN.jpg)