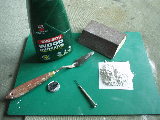
Fancy bases in 5 easy steps!!! Had a lot of people asking how to make quick but effective bases like the ones shown on the decent bases, well read on, here it is in 5 easy steps!!! |
Step 2 Remove the figure from its base, with the soft plastic like the descent mini's I found it easier to paint and varnish them first, then, VERY CAREFULLY using a craft knife cut them from the bases. You will find that a new blade will make short work of them Mix the powder with a little water and PVA to a thick paste. spread it onto the base, a nice thick consistency will give a 'lumpy' effect which looks all the more nicer when sanded ;O) note; You may find that the pre-mixed tubes of decorators filler is a good substitute for plaster and no need for the PVA!! |
||
Step 5 Glue your figure back onto the base and there you go, your favourite hero all set to take a little part of the dungeon home with him to treasure forever!!! Remember its often better to save a few figures up and base them all at once, I often do groups of 10 or 20 at a time in a matter of minutes! |
Site Design By Skud © Bulldog Models 2006 -2007 |

TN.jpg)
TN.jpg)
TN.jpg)
TN.jpg)
TN.jpg)