![]()
Smokin TigersUse the King Tiger section for the basic building instructions but use the modified smoke box shown in this section
The basic principal is the same as the King Tiger unit with one major difference. The smoke is blown along a long tube from the front of the tank to the exhausts at the rear. The easier option would have been cutting away at the speaker box and fitting it to the rear wall as in the King Tiger, however, from experience of previous conversions I have found that modifying the Tamiya speaker box in such a way can make a drastic difference to sound quality and volume. In short I would rather it be a little moere fiddly than ending up with a mighty Tiger roaring like a Trabant!!! Anyhow, unless otherwise stated all the same materials, techniques and tools have been used as in the King Tiger fit, its just as straight forward, have fun :O) |
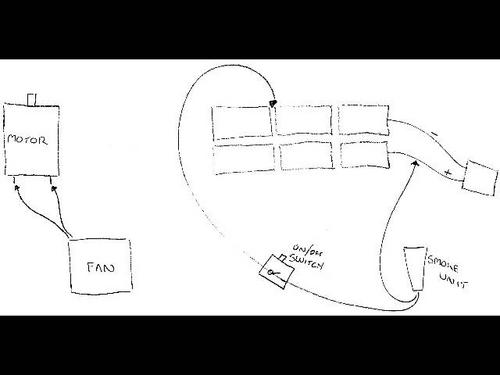
Step 1
Ok, first things first. Connect the fan to the motor terminals. run the tank at full revs, if the fan works, well done! If it doesnt swap the wires around. You may find it useful to remove the tracks or chock the tank up so they are not in contact with the ground as you can easily test run the model as you build. next, we are going to wire the smoke generator directly into the tanks 7.2 battery. connect one wire directly into the red (positive +) wire (slice into the insulation and twist the wire open, insert your smoker wire and it should hold fine, secure with insulation tape) Now take the other wire and connect it via an on off switch between cell 4 and 5 of the battery. You will probably have to trim away the cardboard or plastic cover to access the cells, gently prize the cells apart and insert the wire, you may find it useful to 'fatten' the end of the wire up with a little solder for a tighter fit. Secure with insulation tape. give the smoker a whirl, make sure it works! Be very careful not to touch any exposed wires together as this will short out the battery! *hint* its a good idea to extend all your wires at this point to allow your self a little more room to manouvre, any excess can easily be tucked away after everything is in place
|
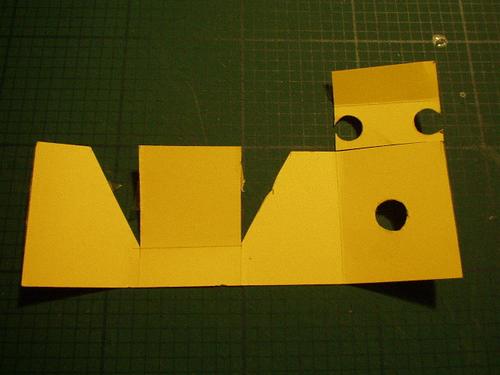
Step 2
Again I found making a card pattern for the smoke box works much better than wasting expensive brass sheet! I will try and scan a 1/1 pattern to attach to emails, should make things easier for others then |
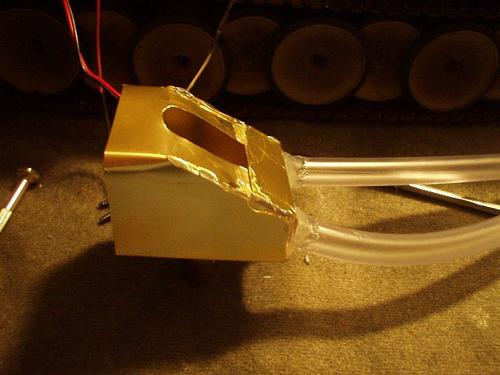
Step 3
fan and tubes attached. Note that the tubes run either side of the smoke generator, its important not to put them directly behind it as the interrupted airflow simply wont shift the smoke along the tubes! Gice yourself plenty of tube to play with, you can always trim it later |
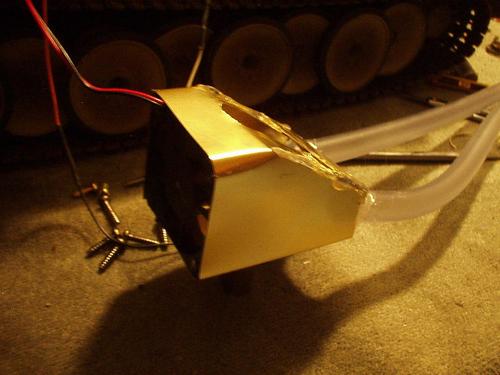
Step 4
Again notice the large hole at the top to allow access, I made a simple lid to sit on top, using a little strip of bluetak as a seal worked quite well. |
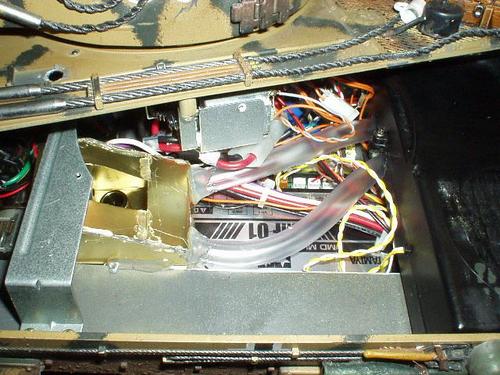
Step 5
The unit sits quite comfortably under the hull support brace. You may have to move the MFD unit back slightly to allow the smoke generator itself to seat right. Take the speaker box apart and drill two holes for the tubes to enter and lining up on the holes in the rear wall drill two exit holes. Use a pair of long nosed pliers to help pull the tube through and up inside the exhaust shields. Although not accurate I personally prefer the smoke to come straight out of the tubes and shoot up into the air. This looks way cooler than when the baffles are on, take my word for it! |
|
Site Design By Skud © Bulldog Models 2006 -2007 |