![]()
A few hints and tips! First of all thanks for buying my interpretation of the Predator Gunship, I hope it brings you many victories on the battlefield!!! Assembling is very simple and you will require very little in way of tools
A craftknife, couple of sanding blocks, model filler and superglue I would also recommend pinning various sections for both strength and to be able to break the ship down for storage and transport My pinning material of choice is 3mm carbon rod, my model filler of choice is 'white putty' Oh and let's not forget the perfect tool for most situations, several different sized fingers! click on the pictures to make them magically grow Don't forget to wash all the resin parts in soapy water, rinse then allow to dry. this will remove any residue of release agent that might interfere with paint adhesion when painting ;) ps. fixed the broken picture links ;)
|

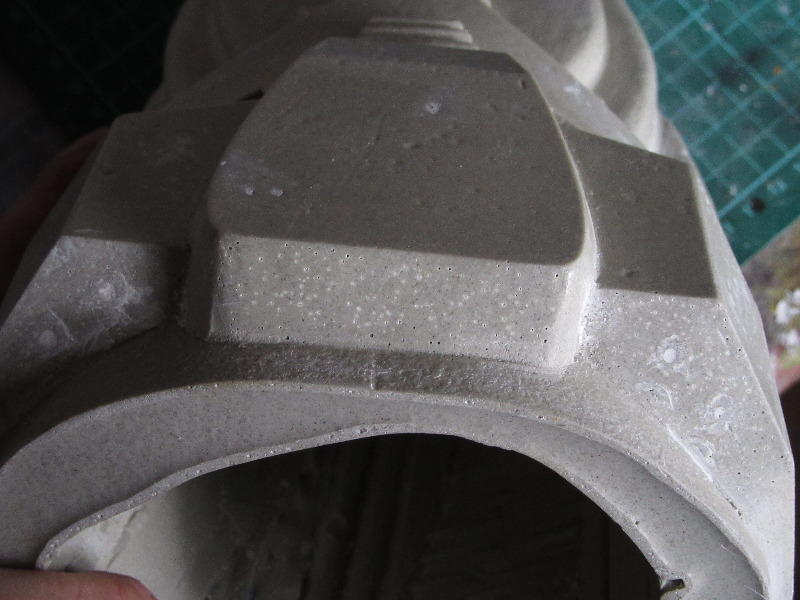
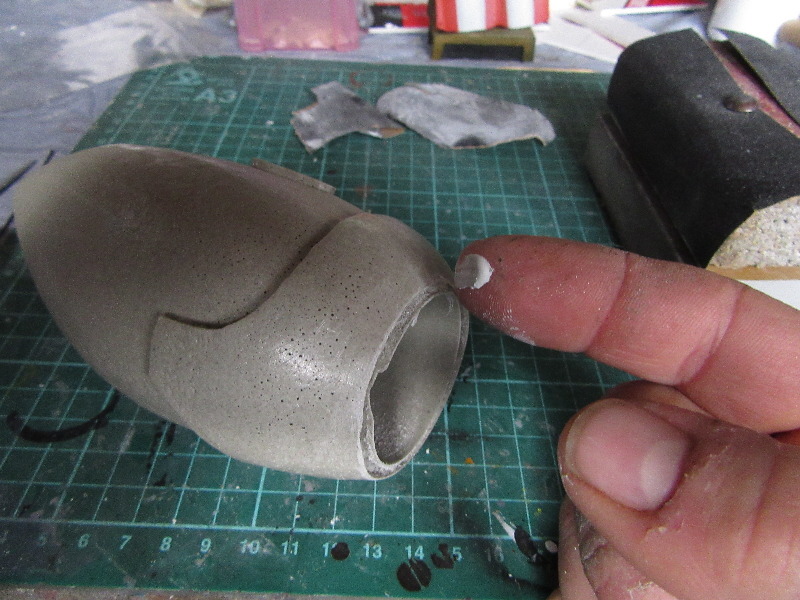
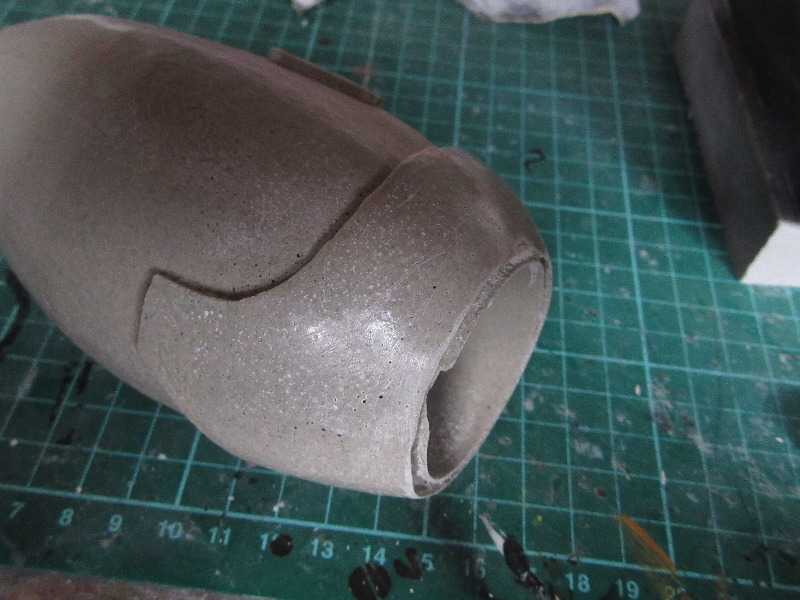
This kit is what is termed as a garage kit, so please bear in mind the masters were all hand sculpted and casting without vacuum equipment as such there will be small imperfections and such but frankly this is very unlikely to take away the awsomeness of the model once it is painted and laying waste to your oponents forces! First thing to tackle are small surface air bubbles, this is super simple...
Best tool for this job is one of those handy fingers I mentioned earlier, simply take a small blob on the end of your finger and rub in circular motions on the surface of the model over the air bubbles, that's it! Once dry give a little rub over with somefine wet and dry paper |
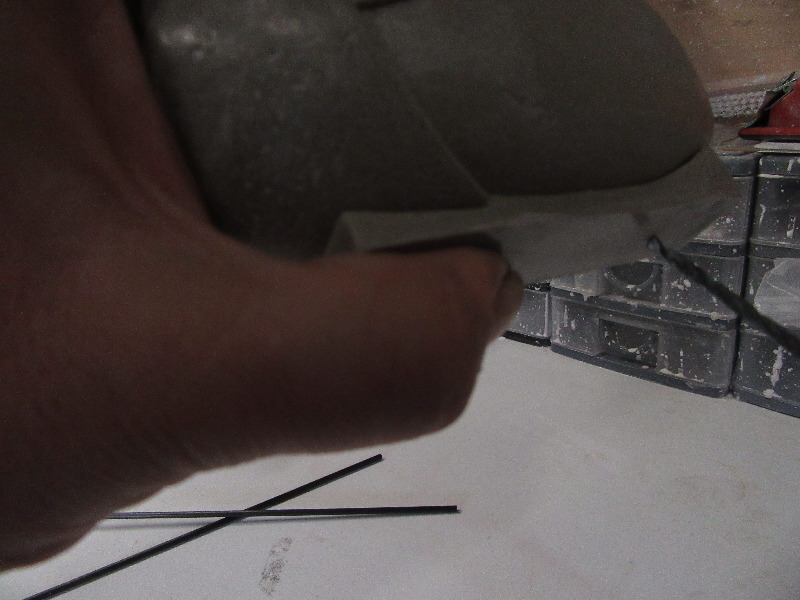
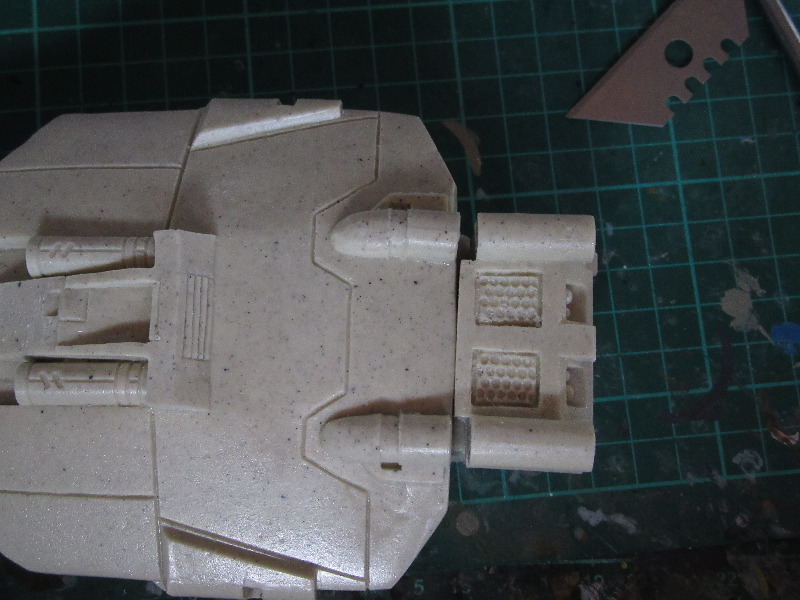
There are two connecting pieces labeled left and right, the best way to line these for pinning is to hold them onto the engine pod (they will sit nicely in position once butted up to the front raised section) while holding this part in place simply drill a couple of holes through and into the engine pod. Once done line the same connecting piece up on the flat plate of the fuselage and drill through (or mark witha pencil) this should mean your holes are perfectly aligned. simply cut a couple of rods to a suitable length and glue into the engine pods. Using this method the engine pods can be removed easily for transport, storage or for use with something else I have planned...watch this space ;) Btw, the quickest way of cutting carbon rod of around 3mm or less is to simply roll it with a craft knife blade then snap it at the join You may need to hold the connecting plates while the glue is drying with a ratchet clamp..or you can warm them in hot water, hold them in shape and run cold water over them |
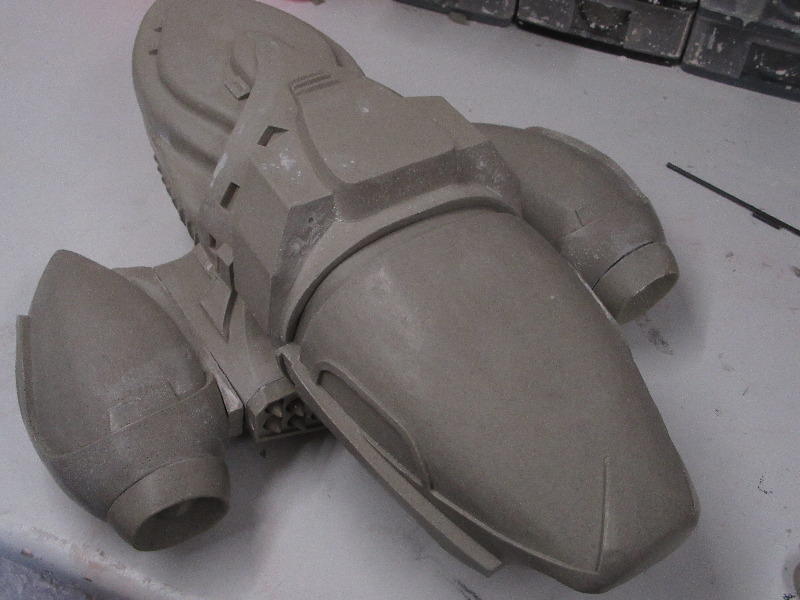
I would recommend attatching the missile pods at this point, it will give you a little more point of reference when lining up the front section, a couple of pins here wouldnt go amiss but if you can support it while drying just glue is perfectly OK, squirt some down into the joins and let capillary action take it where it's needed
|
Trim the pod vanes so they sit relatively flush onto the pod. be careful when trimming the large ones towards the tail end, it can be very easy to snap the end off if youa re not careful (done this many times on resin kits)!! Attatch the intake cowel, try and get the best fit towards the top of the pod, you can make things good around the bottom half with clever use of filler and most of the udnerside is hidden from view when on display After these are fitted and dry grab one of those smaller fingers and apply filler around the joins of the vanes and intake. Once dry give it a good sand, those flexible sanding blocks are brilliant for this as they can be pushed into awkard areas and help to shape the contours from the pod down onto the intake.
|
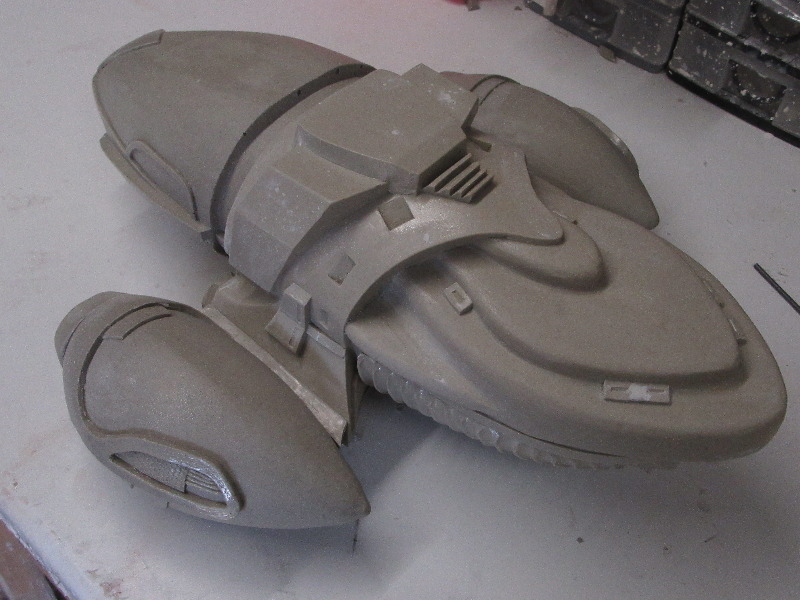
That was easy so far wasnt it? It's starting to look like a gunship now! glue the sensor arrays in place
glue the intake flush to the front edge of the rear section, next butt the door up to it but make sure it can still open and close. you can now glue or tack the rear hinged block of the door in place. the mounting block for the rear landing strut butts up against this as shown Note....you can actually do all this once the main body parts have been assaembled, would recommend this Also note that if you are retrofitting these parts to an existing gunship then you will have to cut/file those little fins on the bottom of the panel so they are flush ;) |
landing gear is a straight forward assembly, note the strut can only go one way, long piston to the back of the foot. The newer aprts are actually modified so the landing gear mount now has a left and a right, the longer plate goes to the outside of the gunship (it won't fit any other way)
The strafing cannons and Plasma beam can be either glued, tacked or magentised in place |
|
|
have fun painting, I look forward to seeing what you can do with her! Btw, I had difficulty tracking down an actual pred text so if you are wondering the font I used was actually from Skyrim! it looks the part I feel. see if you can work out what the clan this ship belongs to is called, it's written along the banner on the front of the ship ;) |
|
|
Created a base for the gunship to sit on and become a crashed objective for the table! Simply pop off an engine pod and sit it in the base, instance objective for marines to capture, Predators to destroy or Xenos to spawn from! Give me a shout if you interested in the base, it also comes with the damage patches that you can simply tack onto the ship with bluetak ;)
|


.jpg)
.jpg)
.jpg)
.jpg)
.jpg)
.jpg)
.jpg)
.jpg)
.jpg)
.JPG)
.JPG)
.JPG)
.JPG)

.JPG)
.JPG)
.JPG)
.JPG)
.JPG)
.JPG)
.JPG)
.JPG)
.JPG)
.JPG)
.JPG)
.JPG)
.JPG)
BULLDOG Mk1 APC
As with all resin kits be sure to wash all parts in soapy water to get rid of release agents, this will create a good base for painting! Generally speaking anything smaller than a titan and I usually glue the whole kit together and then wash it down, I find this a much easier and less fiddly method than washing all individual parts before assembly and plug holes can be very unforgiving to small parts! |
Start by gluing the suspension/rear light section onto the little lip on the main body of the APC then attatch the rear block and door. You can either glue the door in position or carefully drill out the outer hinges and using 1mm or thinner wire pin the hinges and allow the door to open and close. you may have to very careflly trim the hinges down a little if you want to do it this way! Next judge the centreline of the rear wheels (these are the ones without the slots running around the out edge) and glue the wheel suspension supports in place, they are marked up 'L' and 'R' I have found the best way to attatch the suspension arms to the wheels is to glue the forward arms at a right angles onto the central section, once these are dry glue the small circular disks as shown, these give something for the rear wheels to butt up to a glue to instead of just free hanging from the suspension arms adding a little strength to the whole rear assembly glue the wheel assembly to the front arms then attach the rear arms and jobs a good un! |
next simply glue the front wheels so they are spaced evenly in the arches. I recommend using a contact adhesive or something with a little 'wiggle time' (or be vigilante) so you can balance these out. First APC I built I wasnt taking notice and glued the wheels on uneven and the whole APC had a wobble on....very annoying and prizing the bloody wheel off was a nightmare once set, you have been warned!!! |
You may find a few pin holes and dinks in the APC, I tend to leave a lot of this 'damage' as once painted it gives the model some character as battle damage and stuff and takes up washes and weathering techniques very nicely but a simple way to get rid of this sort of surface stippling is to simply rub a model filler in circular motions over the offending area to fill the blemishes. I actually use water based casting plaster (wet my finger then dunk like a sherbet) which does a grand job of this but I do have buckets of the stuff laying around so model filler is probably your better option :) All that's left now is the really fun bit, get out the paints and get some colour on this beast, be sure to post pics of your finished models, love to see what people have done :) |
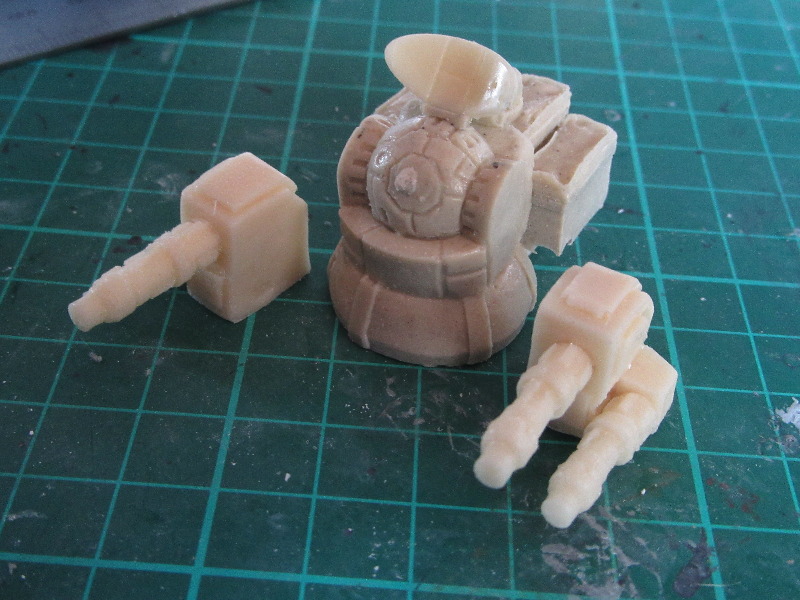
The turrets are pretty straight forward, just glue the barrels to the turrets with the dangerous end pointing outwards! The cradle is assembled and simply sits on top of the APC, it is designed to be removed and you can simply swap out the turret of your choice as your game desires :) |
.JPG)
.JPG)
.JPG)
.JPG)
.JPG)
.JPG)
.JPG)
.JPG)
.JPG)
.JPG)
.JPG)
.JPG)
.JPG)
.JPG)
.JPG)
.JPG)
.JPG)
.JPG)
.JPG)
.JPG)
.JPG)
.JPG)
Predator Escape pod
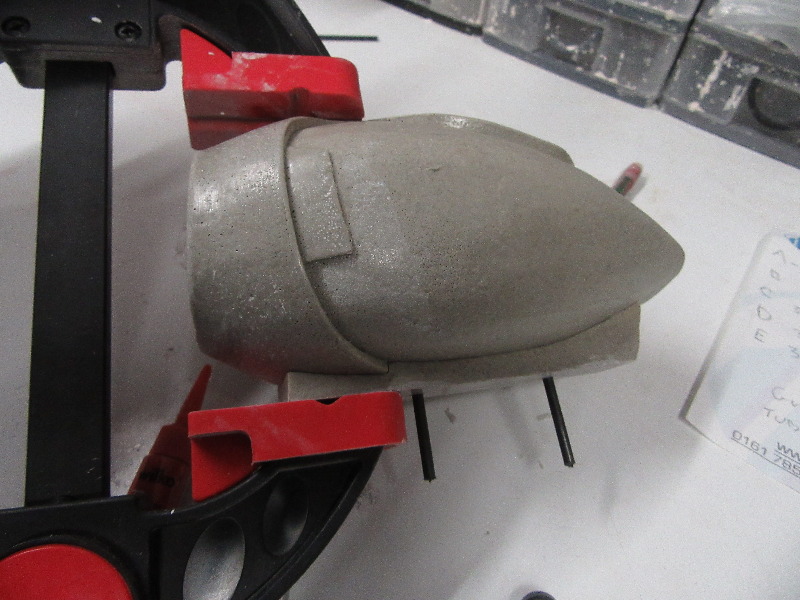
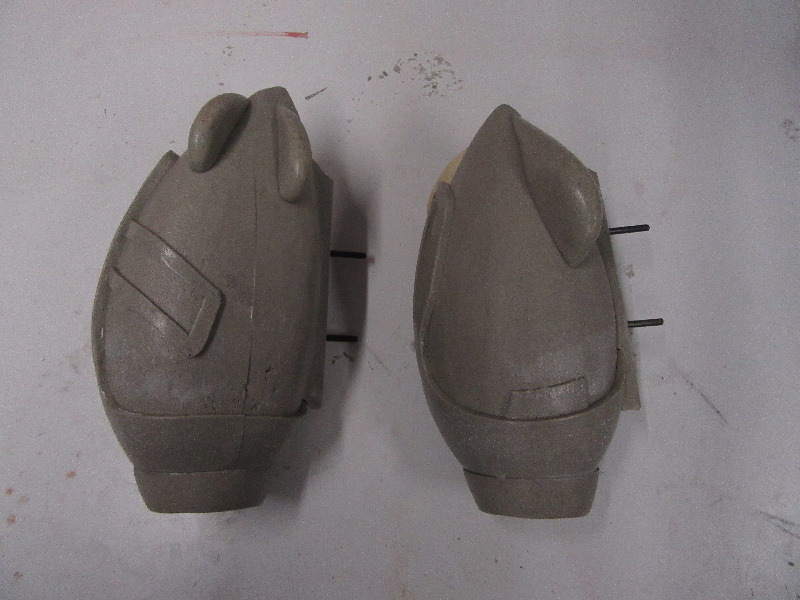
Super easy to assemble just a few tips to help you on your way! I recommend superglue. sometimes PLA can bea little awkward if you are having problems simply rough up the surfaces to be glued with a little wetndry/glasspaper First step assemble the part with the nozzles on first, notice the short half pointing forward, this shoould fit nicely into the curve of the main body The engine mount will butt up against this part so everything is where it should be, the other parts are then glued in place as shown |
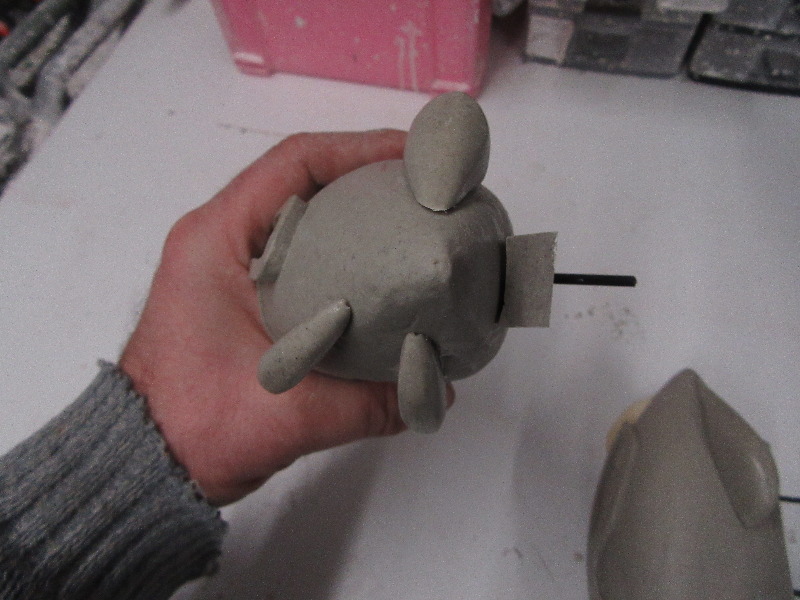
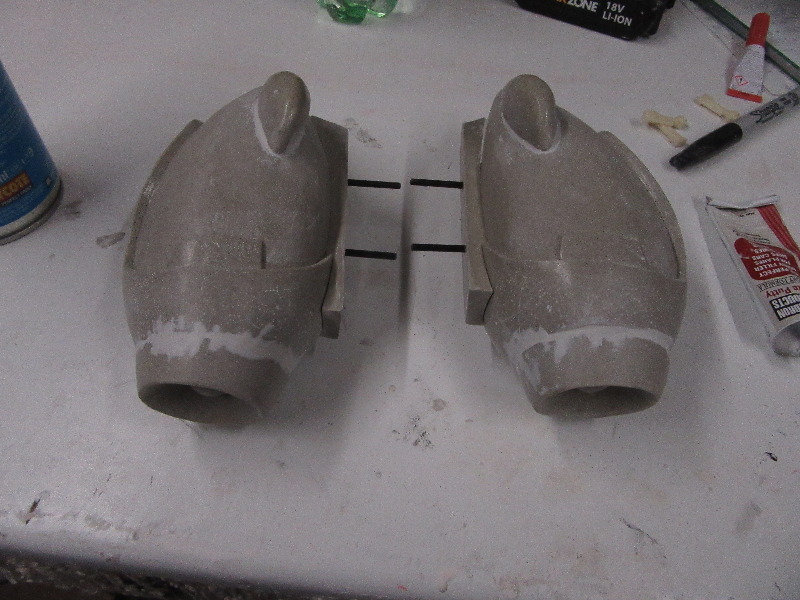
.JPG) .JPG) .JPG) Attach the wings first then glue the skids in place, adjust them so the wings are not touching the ground, yeah I did this the wrong way round on my seminal build! Might be an idea to magnetise the wings at this point, I may well do that at some point on a future build, nice cool little touch! Attach the engines (note the detail on the outsides of the engines, they are not symetrtical there is a left and a right) Finally add the two widgets, there are slots where they fit, you can't get it wrong! You are all done, have fun!! |
.JPG)
.JPG)
.JPG)
Predator Hunter Bikes
| Guide coming ASAP! but for now the only
tricky part to assembly involves the handlebars. I recommend gluing them in place first. Get familiar with them, there is a left and a right, check out the pics to the right, the little flat angled end glues into the little recess on the bike body, you don't have to be exact, let them dry then dryfit the rider in place, you can actually leave him unglued he fits quite snugly and it adds a little bit of realism if you choose to dismount during play. Anyhow, back on topic. CAREFULLY apply heat to the bars, I personally use a little turbo lighter an indispensable tool for modellers! Once the bars become a little pliable mate them up with the riders hands for a perfect fit..easy! As I said be careful and stay away from the riders hands little burned fingers are no good for doing predator things! The platform on teh back does not need to be glued, it will just slot on place so you can remove it if you prefer One more tip. carefully pop the ball into the socket joint holding the stick close to the top and gently wiggle it around a few times, this will loosen it up a little so there will be less risk of snapping the stick when banking round those tight corners! have fun and good hunting!!! |
.JPG) .JPG) .JPG) .JPG) |
Site Design By Skud © Bulldog Models 2006 -2007 |